Concrete counter tops commonly seen in Kitchens are counters that have a concrete surface. Homeowners prefer concrete counter-tops to quarried stone or petroleum-based materials because they have great looks and are environmentally friendly.
Here is a step-by-step guide to making concrete countertops:
1.Creating the form
The first step is to establish the dimensions you want the countertop to have. Next, create the form into which you will pour the concrete. Remember that a great concrete countertop will largely depend on the mold or the form created.
Available material for creating a form include plywood,plexiglas,sheet metal or fabric. But the most common concrete countertops forming method is melamine-coated particle board.
2.Make cutout for sink
You might want your concrete countertop to incorporate a sink. If that is the case, then make cutouts for the sink itself or for a faucet. After making cutouts ensure to clean clean the mold of sawdust and other materials. Remember that the bottom of the mold will be the top of the countertop, so it’s important the concrete sets on a debris-free surface.
3.Reinforce the form
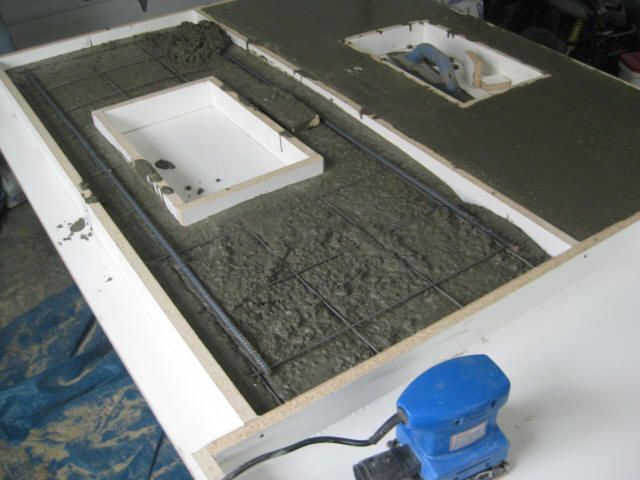
Next, reinforce the form of using a steel mesh. For best results, suspend the mesh at the middle point in the vertical height of your melamine form. This is done by Drilling screws into the outside walls of your frame and connect the mesh to the screws via zip ties, strong ties, or even a bungee cord; then extend the metal wiring across the breadth of the frame. You can also Mix the concrete however you like; pour it to fill the form halfway; set in the steel mesh; then fill the rest of the form.
4.Mix and pour the concrete
Now it’s time to mix the concrete. Mixing the concrete correctly is critical to its strength and durability. So follow manufacturers instruction carefully. Remember that the concrete at the bottom of mold will become the top of the concrete slab.For best results, aim to achieve a thick,peanut-like consistency.
Now Pour concrete into the form to fill its volume completely, then use your hands to work the material along the edges and into the corners.
Smooth the concrete surface with a hand trowel. This will draw the aggregates to the top.
To settle the concrete, use an orbital sander without sandpaper against the sides of the mold. The vibrations will help bring air bubbles in the concrete up to the surface.
When finished, gently cover the countertop with a sheet of plastic or damp burlap to protect it from dust and dirt.
Let the concrete cure at least a week—the more it cures, the stronger it gets.
5.Remove the form and complete the job
Now remove the support frame from the sides and ends of the form incase you notice small cracks and or bubbles on the countertop perform spot repairs with concrete patching compound.
Finally, wash the counter, removing all particles and dust now allow your countertop dry completely, then complete the job by applying a concrete sealer to waterproof it.
There you have it. You have just made a concrete countertop. The good thing is that this is a DIY project requiring no special skills.

