A well-designed patio can transform your backyard into a functional and stylish outdoor living space.
Whether you’re planning a cozy area for family gatherings, an entertainment hub for guests, or a quiet retreat for yourself, a DIY patio installation is a rewarding project that adds value to your home.
This guide provides step-by-step instructions, essential tips, and practical advice to help you create the perfect patio.
Why Build Your Own Patio?
1. Cost-Effectiveness
Professional patio installations can be expensive. Taking the DIY route significantly reduces costs, allowing you to allocate your budget to premium materials or additional backyard features.
2. Customization
A DIY patio gives you complete creative freedom. You can tailor the size, shape, materials, and design to suit your preferences and backyard dimensions.
3. Personal Satisfaction
Building your patio provides a sense of accomplishment and pride in creating a space you and your family will enjoy for years to come.
Step-by-Step Guide to Patio Installation
Step 1: Plan and Design
Before you begin, determine the purpose and size of your patio. Will it be a dining area, a lounging space, or a multi-functional area?
- Measure the Space: Mark out the area where the patio will be installed using stakes and string.
- Choose Materials: Common materials include concrete, brick, natural stone, or pavers. Each offers unique aesthetics and durability.
- Check Permits: Consult local regulations to determine if you need permits for your project.
Step 2: Gather Materials and Tools
You’ll need the following:
- Materials: Pavers, sand, gravel, landscape fabric, edging material.
- Tools: Shovel, wheelbarrow, level, tape measure, tamper, and a rubber mallet.
Step 3: Prepare the Ground
- Clear the Area: Remove any grass, rocks, or debris from the marked space.
- Excavate: Dig 6–8 inches deep, ensuring the area is level and slopes slightly away from your home for drainage.
- Lay Landscape Fabric: Prevent weeds from growing through your patio.
Step 4: Create the Base
- Add Gravel: Spread 4–6 inches of crushed stone evenly and compact it with a tamper.
- Lay Sand: Add a 1–2 inch layer of sand over the gravel and smooth it out.
Step 5: Lay the Pavers
- Start from one corner and work outward, placing the pavers tightly together.
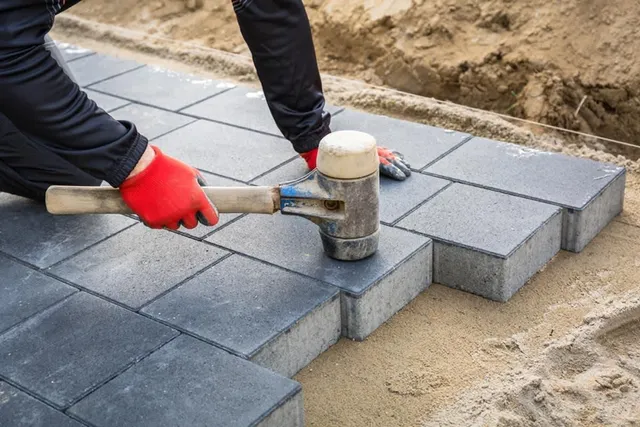
- Use a level to ensure each paver is even, tapping them into place with a rubber mallet.
- Cut pavers with a masonry saw or chisel for precise edges, if necessary.
Step 6: Secure the Edges
Install edge restraints to keep the pavers in place and maintain the patio’s shape over time.
Step 7: Fill the Joints
- Spread polymeric sand over the patio surface and sweep it into the gaps between pavers.
- Mist the patio with water to activate the polymeric sand, which will harden to secure the pavers.
Step 8: Clean and Seal
- Clean the patio surface to remove any dust or debris.
- Apply a sealer to protect the pavers from stains and weather damage.
Design Ideas for Your Patio
1. Add Greenery
Incorporate planters, flower beds, or vertical gardens around your patio for a vibrant look.
2. Install Lighting
String lights, lanterns, or built-in LED fixtures create a cozy ambiance, perfect for evening use.
3. Include Furniture
Choose weather-resistant furniture that complements your patio design. Add cushions for extra comfort.
4. Fire Pit or Water Feature
A fire pit or fountain can become the centerpiece of your patio, enhancing its appeal.
Tips for a Successful DIY Patio Project
- Plan for Drainage: Ensure water flows away from your home and patio surface.
- Double-Check Measurements: Precision during planning and laying is crucial for a professional finish.
- Take Your Time: Rushing can lead to mistakes. Tackle the project methodically.
- Seek Help When Needed: For larger patios, having an extra set of hands can save time and effort.
Conclusion
Installing a DIY patio is a fulfilling project that adds functionality and style to your outdoor space. By following this guide, you can create a stunning patio tailored to your vision and budget. So, roll up your sleeves, gather your tools, and start transforming your backyard today!
Also Read
DIY renovation ideas for beginners: A step-by-step guide to transform your space
Transform your space: 10 DIY projects that instantly boost Your Home’s Value

